
Keri-Rae Barnum - March 4, 2021 - 
Amazon Author Central – How to Setup Your Author Page on Amazon!
What if I told you there was a free tool you can use to market your book even when you are not actively spending time on marketing? A platform that allows you to optimize your visibility, credibility and increase sales on one of the largest e-commerce sites in the world? It might sound too good to be true, but I promise this is real.
In fact, if you’ve heard of Amazon Author Central and haven’t set up your account yet, that is exactly what you’re missing out on.
Amazon Author Central is free, easy to use and offers valuable tools to increase your online presence, your readership and most importantly, your sales.
This platform not only helps Amazon browsers find your books, but it keeps them on your sales pages longer and gives you access to special tools that can help turn browsers into buyers.
What is Author Central and Why Do You Need It
Any published author with a book on Amazon can claim an Author Central profile and set up an Amazon Author page.
Here we can see Joanna Penn’s author profile.
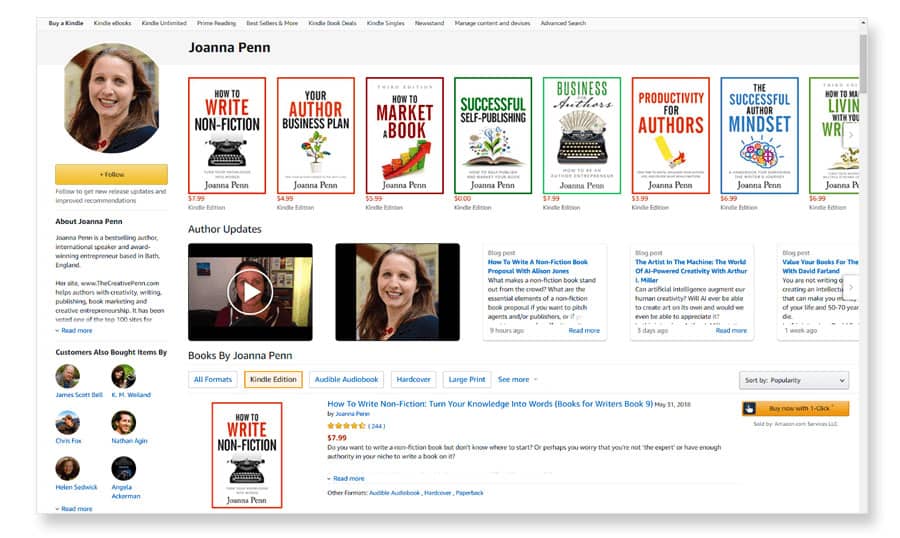
This profile is essentially a free webpage hosted by Amazon that is devoted to you and your books. Through this platform authors can showcase their books, access cool features to optimize their Amazon.com book listings and even connect to their own website through shared blog posts.
Sounds like a no brainer, right?
Yet, when I asked a group of authors, only a small handful had claimed their Author Central profile and ever fewer had taken the time to do anything beyond creating an account.
That blew my mind.
If you know about Amazon Author Central, why wouldn’t you take advantage of this amazing sales boosting platform?
Most of the authors who weren’t fully utilizing their Author Central account cited being overwhelmed by the set-up process. But the truth is, setting up and optimizing your Author Central profile isn’t scary – it’s actually easy and can even be a lot of fun!
So, if you haven’t yet claimed (and optimized) your Author Central profile, let’s break it down step-by-step so you can start taking advantage of this tremendous marketing tool right away.
Create Your Author Central Account
Getting started with your Author Central account is easy.
Visit author.amazon.com and click the orange “Join for free” button. This will bring you to a sign-in page where you can enter your KDP (Kindle Direct Publishing) or Amazon.com account credentials.
If you don’t currently have either of these accounts, select the “Create your Amazon account” button and follow the instructions to create one.
Once you have logged in, Author Central will require that you verify your email address.
Check your inbox for the verification email from Author Central and click on the provided link to verify your email address.
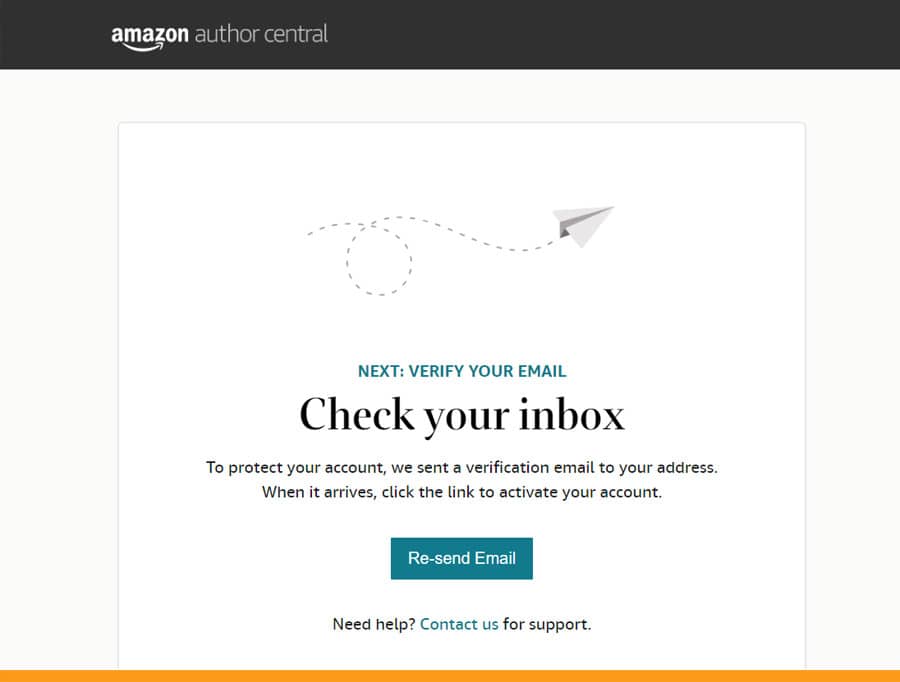
After verifying your email address it’s time to verify that you are, indeed, an author with a published book listed on Amazon.
- Using the provided search bar, enter in your book ISBN, Title or Author name.
- Select your book cover from the search result options.
- Verify that the selected title is your by clicking the teal “Join Amazon Author Central” button.
Almost there!
Author Central will now review your account for authenticity before allowing the account to go live. In the meantime, you can get to work on your author profile.
Pro Tip:
Author Central was updated to a universal page for worldwide access in November 2020. If you have an Author Central account but have not logged in recently, you may be prompted to “join.”
This is prompting you to join the updated version of Amazon Author Central, which you should do. Once you accept, your old Author Central profile will be transferred over and you will also gain access to new and updated features.
You will also notice that certain features, like claiming a custom URL for your Author Central profile, are no longer available.
Set Up Your Author Central Profile
Step 1: Author Photo
Whether it’s an action shot, a head shot or even an avatar, your author photo will give your readers someone to connect with.
Select “Edit Profile” and add your author photo by clicking on the teal “Add photo” button. Browse through your computer files for the perfect hi-res author photo and select it. Make your photo visible on your author profile by selecting the “publish” button.
Step 2: Add Additional Photos and Videos
To give your profile even more character, upload additional photos and videos to your Author Central profile.
Click on the “Upload Media” button.
Select the teal upload button under the photo icon to choose photo to upload. Great photo choices include book events, candid and action shots.
Select the teal upload button under video to choose a video; a book trailer, short author Q&A or book reading.
Photos must be a JPEG, PNG or GIF that is at least 300 pixels in width and height and video’s must be a AVI, FLV, MOV, MPG, WMV or MP4 file that is under 500MB. Video’s do take a while to upload, so don’t be alarmed if you don’t see them on your profile right away.
Step 3: Author Bio
Your author bio is your chance to introduce yourself to your readers.
Keep in mind when writing your author bio that this isn’t a resume. No one wants to read a litany of your past jobs and accomplishments.
Rather, craft a biography that gives the reader a glimpse into who you are – the books you have written, your interests, accomplishments and even a fun bit of trivia about yourself.
A few more things to consider when writing your author bio.
Weave keywords in when possible.
Include your social media handles.
End your bio with an invitation to visit your website and provide the URL.
Write and save this bio to your computer so you can easily copy and paste into Amazon Author Central whenever you are ready.
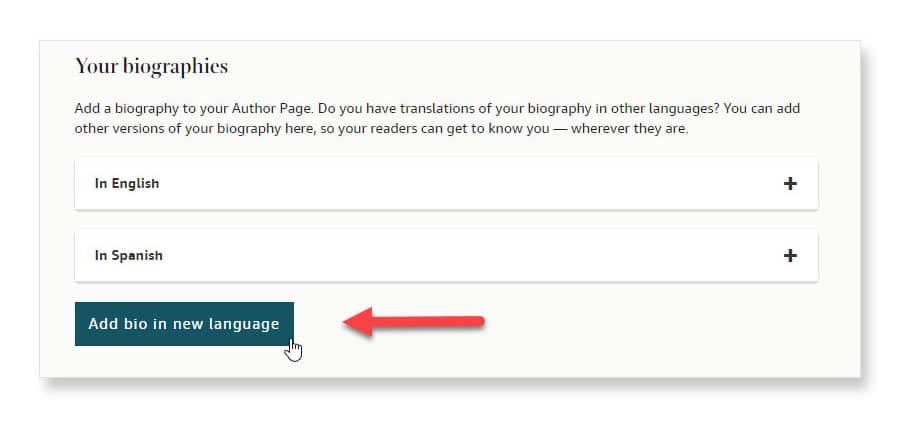
Once you have the perfect bio, click on the “add bio” button, select your primary language, copy your bio into the provided space and select “preview bio.” If the preview looks good, go ahead and publish your author bio to your Author Central profile.
Pro Tip:
Did you know you can add your bio in multiple languages?
That’s right, upload your bio in English, Spanish, French, German, Italian, Japanese and Portuguese so that your Author bio will appear on Amazon sites internationally.
If you are not a language whiz, consider using a translator like Google Translate o get your bio translated into multiple languages.
Step 4: Connect Your Blog
Connecting your blog to your Author Central profile is a fantastic way to increase traffic to your website. To get started, click on the “Add blog” button on the Profile tab. Next, you will need to enter the RSS address for your blog and click “Add.”
Not sure what an RSS address is? This isn’t your website URL, but rather a web feed address that allows the Author Central application to “read” your blog and share your posts to your author profile on Amazon.
You can find your blog RSS address by going to your blog, right clicking on the page and viewing the page source. Use the “find” feature (command + F for Macs, or ctrl + F for Windows) to search for “RSS” or “feed.”
If that doesn’t work for you, you can use an app like FetchRSS to generate a feed for your blog.
Step 5: Claim Your Books
Since you had to claim at least one title to verify your Author Central account, you should see that book on your “bookshelf.” If this is your only book, you’re ready to move on to the next step.
If, however, you have more books you would like to claim, follow the directions below.
Steps to Claiming a Book
Click on the “Books” tab on the page navigation bar.
You will see an offer to add more books. Click “add more now.”
Search for your book by ISBN, Title or Author.
Select your book when you see it by clicking on the front cover image.
Click the teal “Add this book” button.
Once an author has claimed their book, their name becomes hyperlinked to their Amazon Author Page. If an author has not claimed their book, their name will appear in gray.
We can see in the example below that James Patterson has claimed, The Summer House but his co-author, Brendan DuBois, has not – which means he’s missing out on the marketing potential of this highly rated book. Yikes!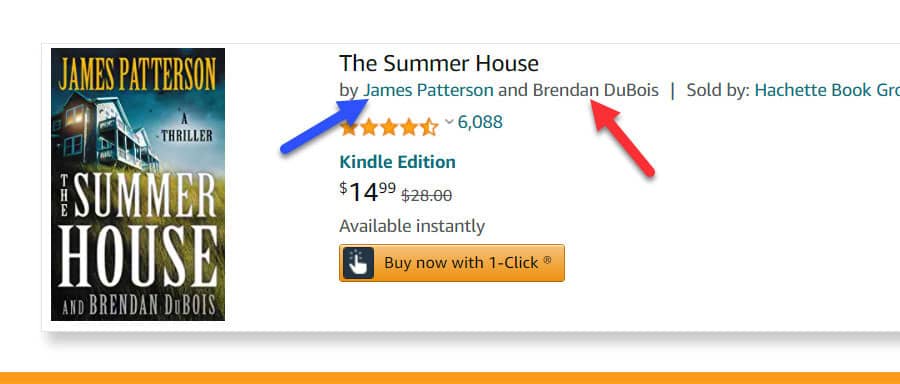
Claim Books You Have Co-Authored
Speaking of co-authors, be sure to claim any books you have collaborated on.
Don’t worry about stealing the credit from your co-author(s). As you can see in the example below, Amazon allows multiple authors to claim a title if they contributed to writing it.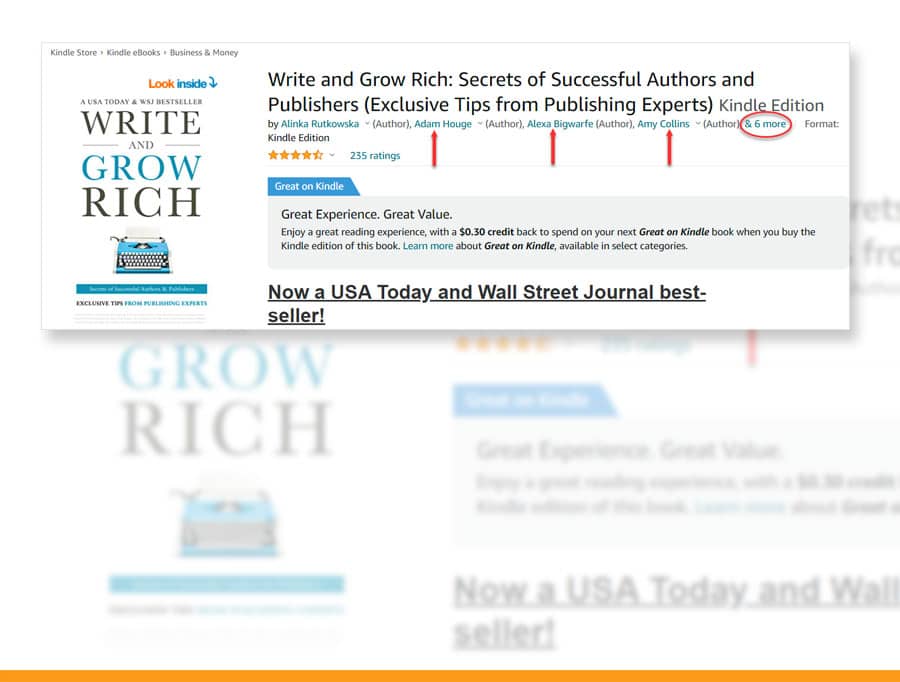
Claim Books Written Under a Pen Name
If you are writing under a pen name, follow steps 1-5 above for claiming a book.
Once you Click the “Add this book” button, you will be given the option to claim your pen name profile and claim your book to that author account.
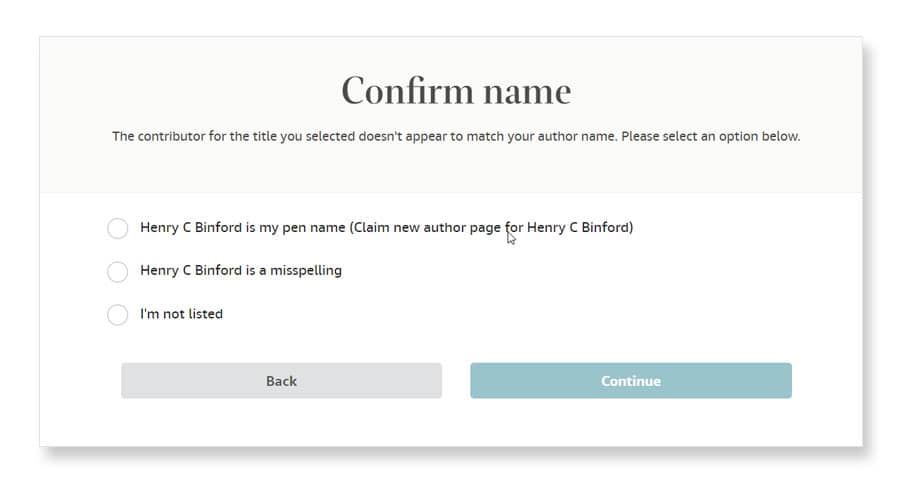
Once you’ve claimed all of your books you’re ready to move on to the next step.
Pro Tip:
Be sure to claim your book(s) in every format – paperback, hardcover, kindle and audiobook.
Optimize Your Book Listings
Have you ever wondered how other authors add Editorial Reviews or a special “From the Author” note on their book listing on Amazon?
The secret is right here on the “Books” tab on Author Central.
It’s not enough just to claim your book, you also want to optimize your book listing so you can stand out amongst the competition.
Select the book you would like to optimize by clicking on the cover.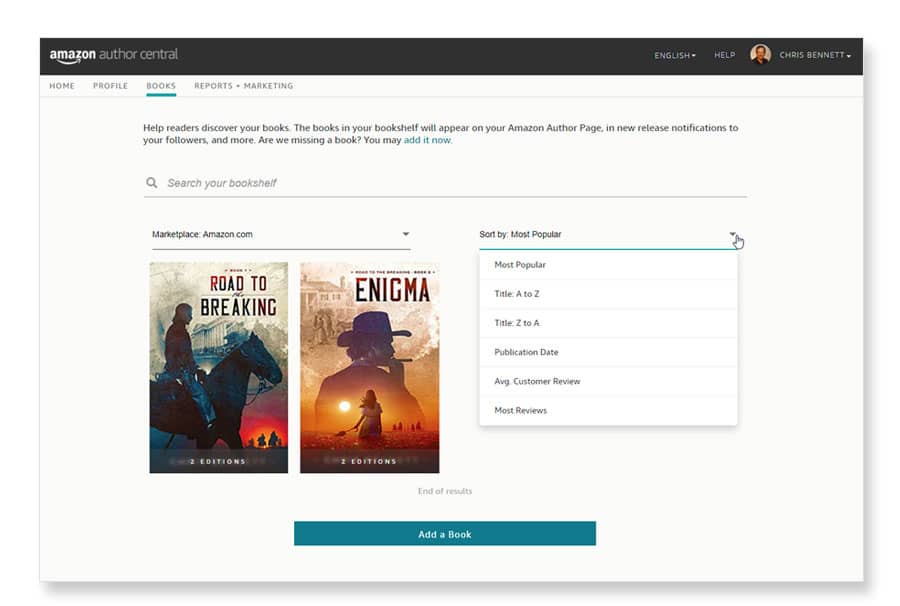
If you have claimed multiple formats of your book, each one will show up on the screen.
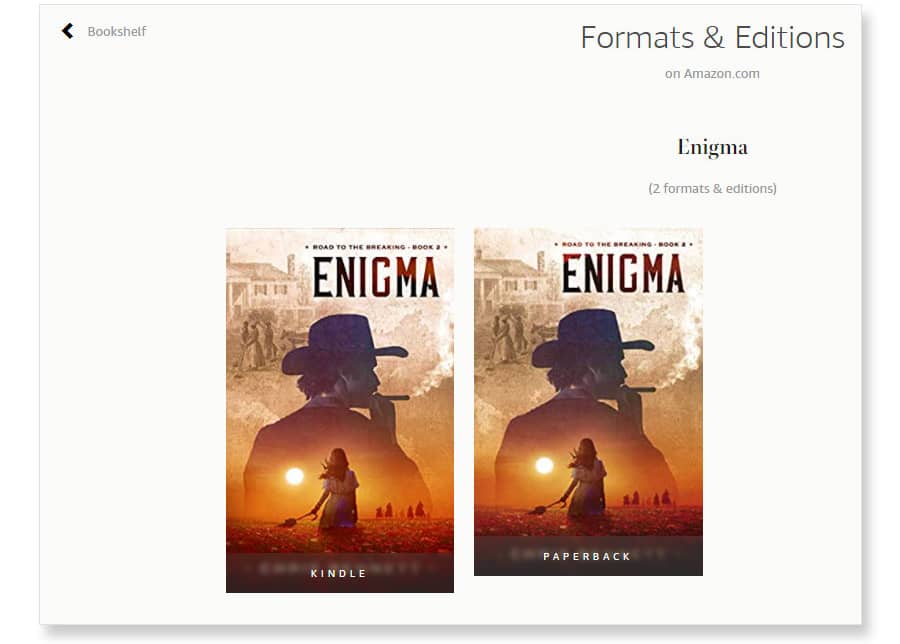
Select the format of your book you wish to optimize the listing of. For example, Kindle.
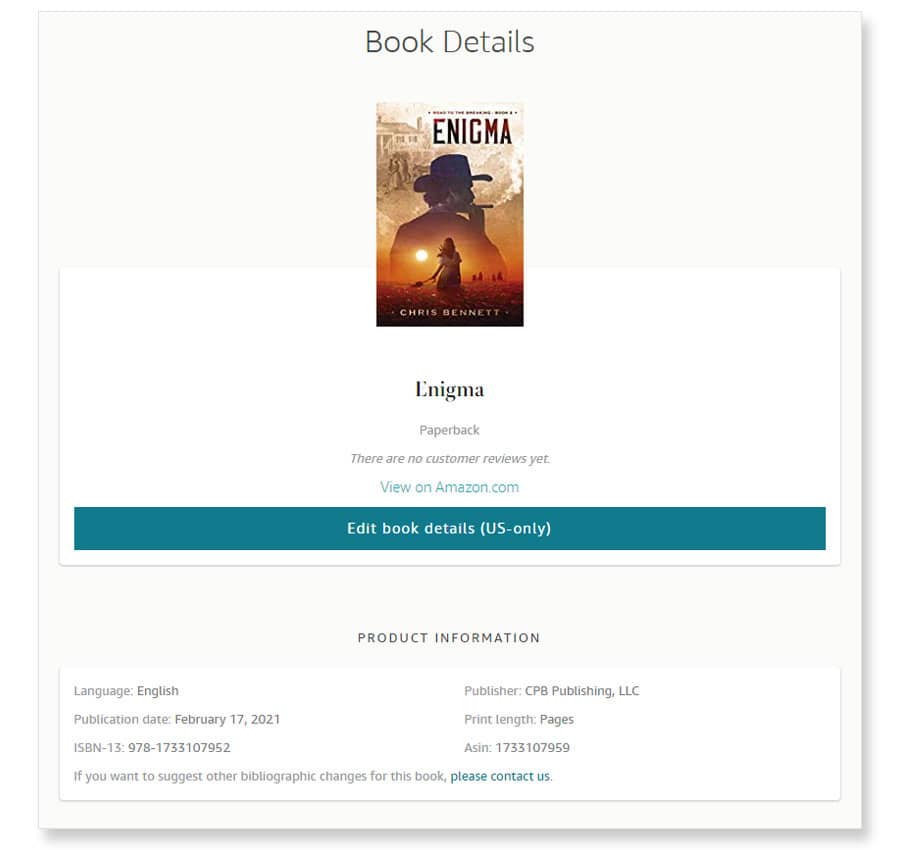
You will be brought to a landing page with the book details and a button that reads “Edit book details.” Click this button.
Special note:
While you can (and should!) claim your audiobook listings, the “edit book details” page is not currently available for audiobooks. If you click on the button you will receive an error message as seen below.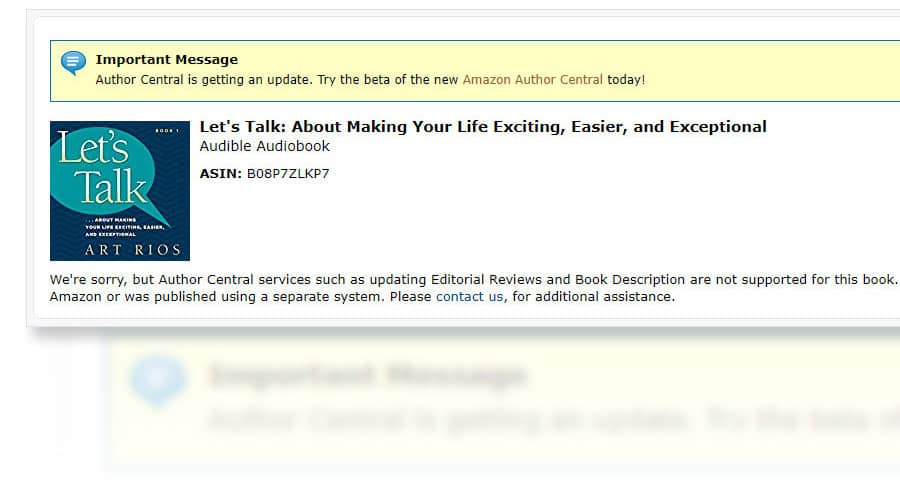
On this page you will be able to add reviews, edit and format your product description, add a note to your readers, set-up a short tag bio to show on your Amazon sales page and more.
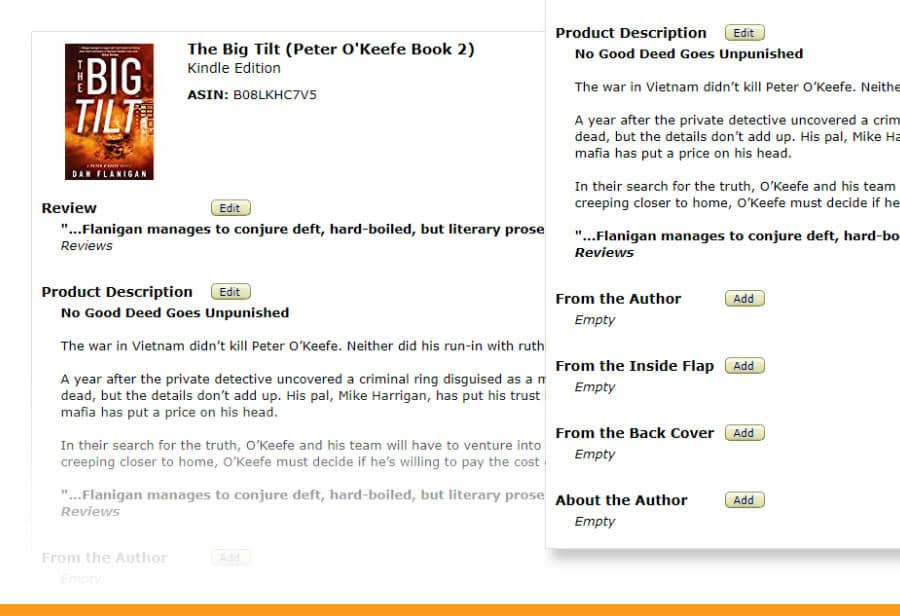
If you would like to add to or edit any of the available fields, click on the “Add” button to the right of the heading.
A text pane will open which will allow you to input any desired text. You can also use the text formatting tools to include bold, italics and numbered or bullet points in your text.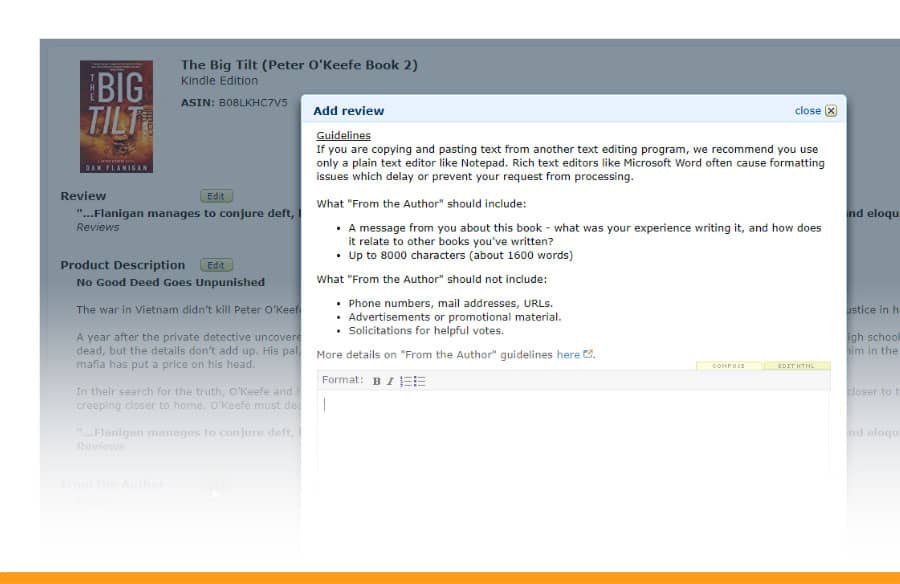
Once you have finished adding and editing your text, click the button to first preview and then publish your text.
Repeat the process for each title and each format of that title you wish to update.
Pro Tip:
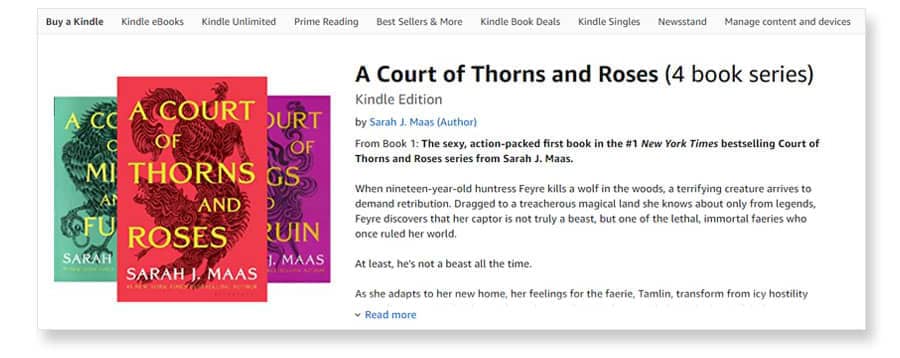
If you have a book series and would like to link them together for increased sales and read-through, be sure to follow these steps to create a series on Kindle Direct Publishing (KDP).
Check Out Your Live Author Profile
You’ve put in the work and now it’s time to see what Amazon browsers will see.
Go to the homepage of your Author Central profile. Here you will see an “Author Page” section.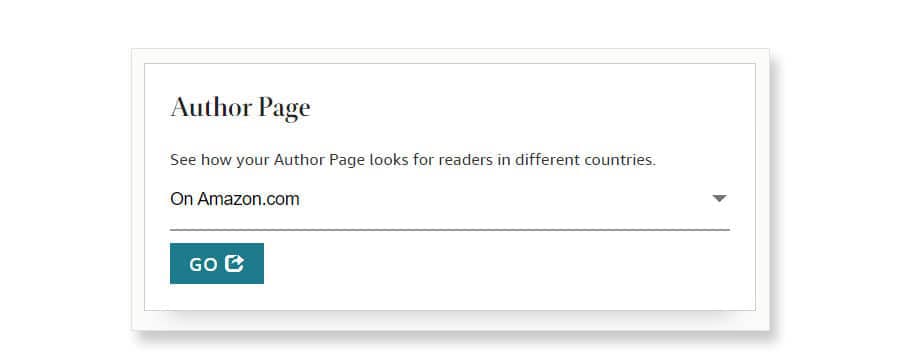
Select an Amazon platform of choice using the dropdown and click “GO.”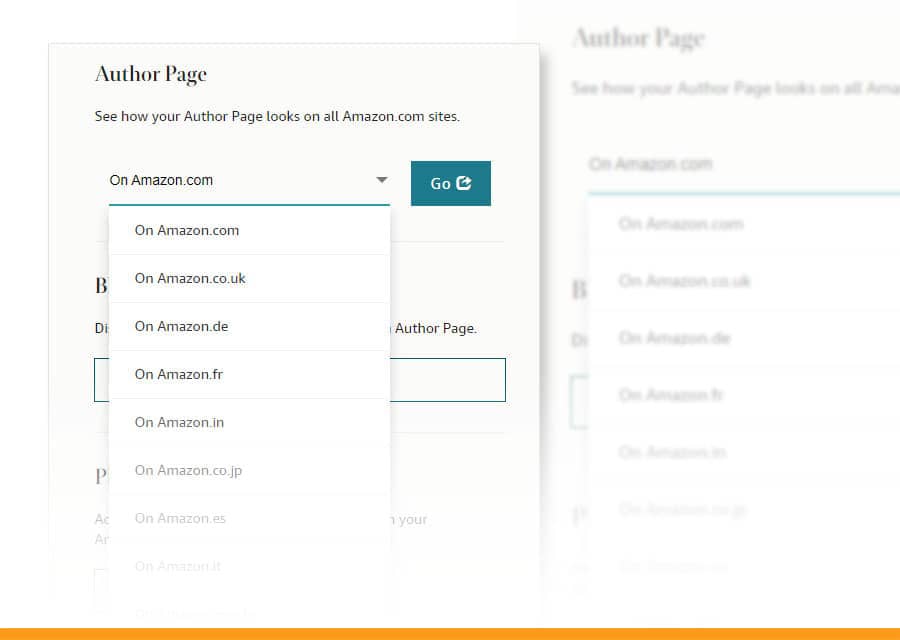
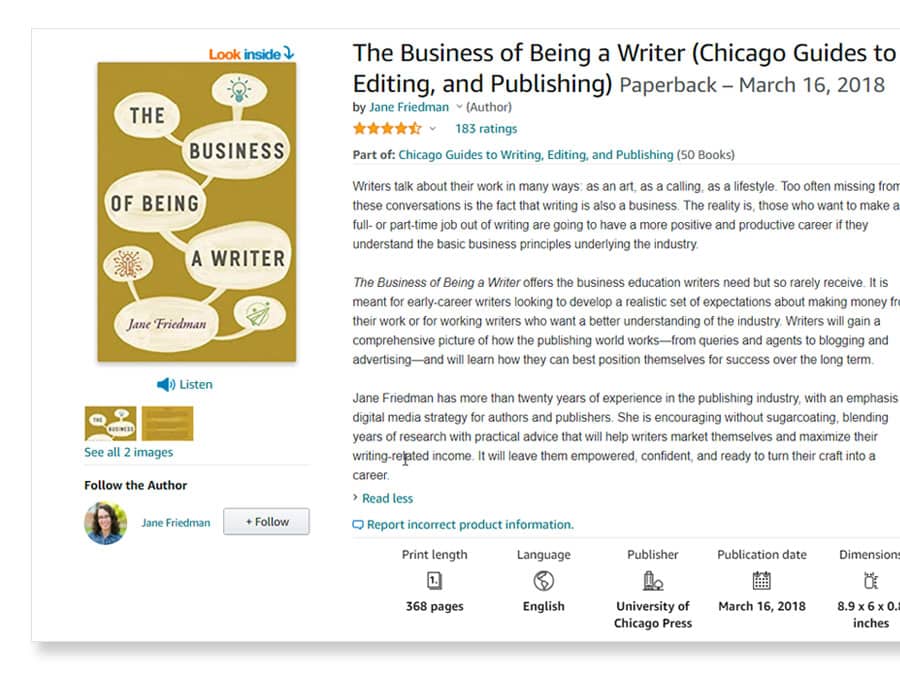
We’ve chosen the Amazon’s US platform, Amazon.com to view Jane Friedman’s Author Central profile – an excellent example of what you want your page to look like.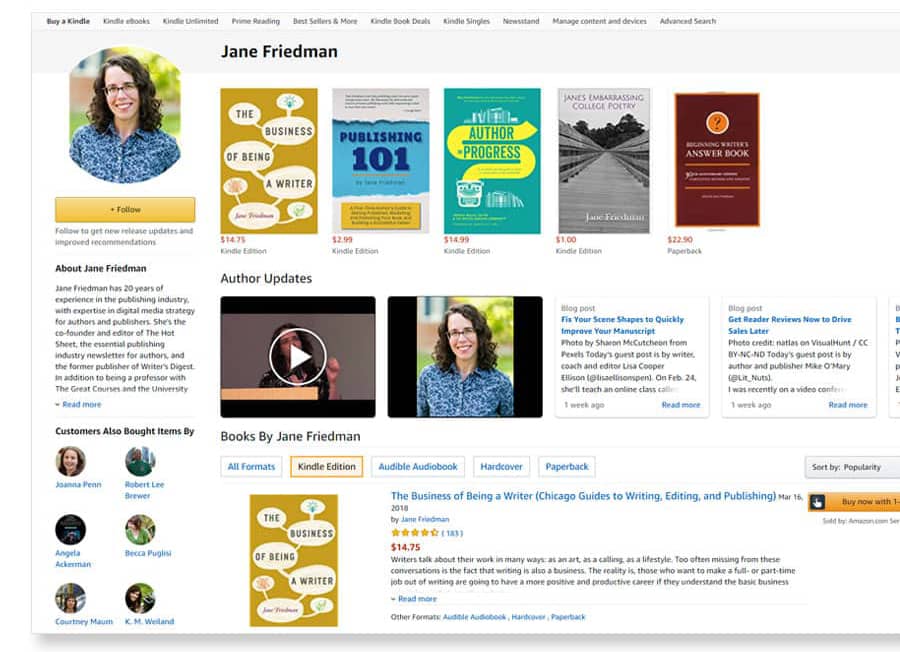
You can also click on any of your books to view that listing.
Be sure to scroll down and check out your Editorial Review section if you took the time to optimize this on the “Books” tab of Author Central.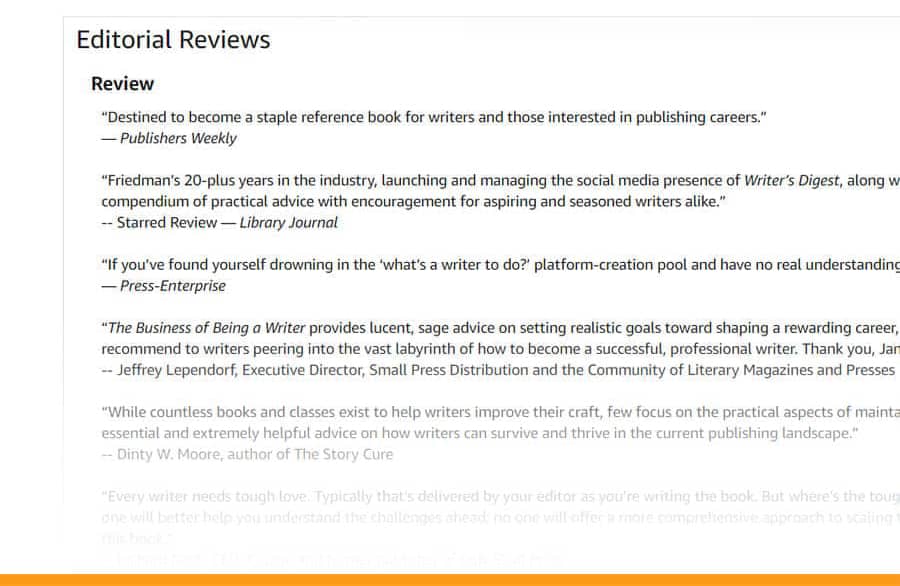
Neat, huh?
But Wait… There’s More!
You may be done creating your Amazon Author Central profile, but we still have a few cool features to explore.
In addition to allowing authors to create an awesome profile and optimize their book listings, Author Central also provides authors with tools to check their book sales and Amazon ranking.
These tools are particularly helpful for traditionally published authors who do not have access to their sale data by way of KDP.
Check your Sales and Amazon Ranking
Go back to Author Central and click on the “Reports + Marketing” tab at the top of the page.
Here you will find options to check:
Sales Rank
Bookscan (US-only)
Customer Reviews
Sales Rank
The sales rank feature will let you see your titles’ Amazon Best Seller Rank on any given day. There are also options to view historical sales rank and category rankings.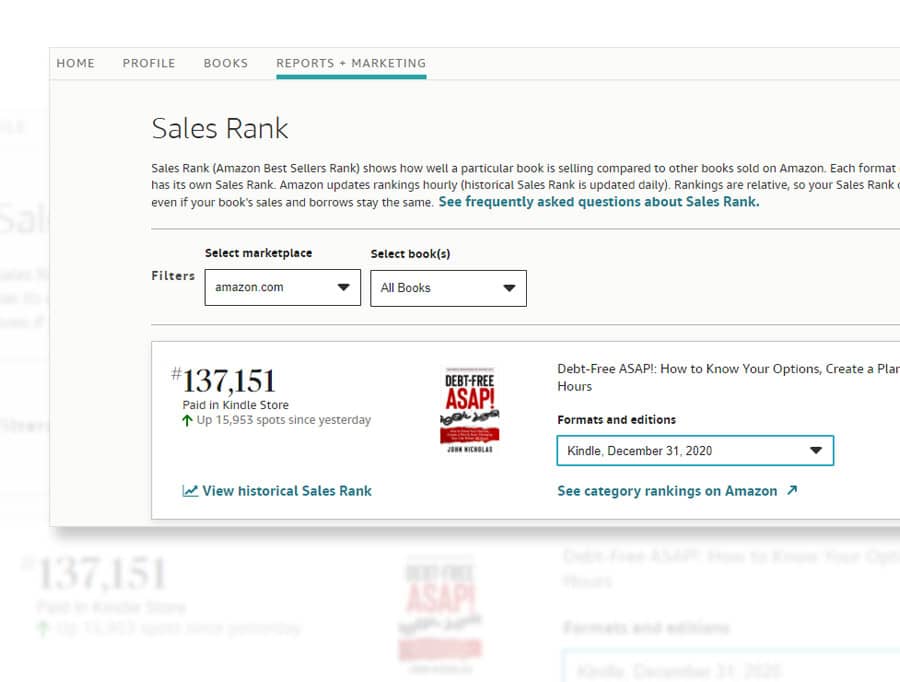
Book Scan
The book scan tab gives US based users access to NPD BookScan – a company that estimates they report 85% of all retail print book sales – numbers.
Sales can be viewed in weekly increments and by geographic location.

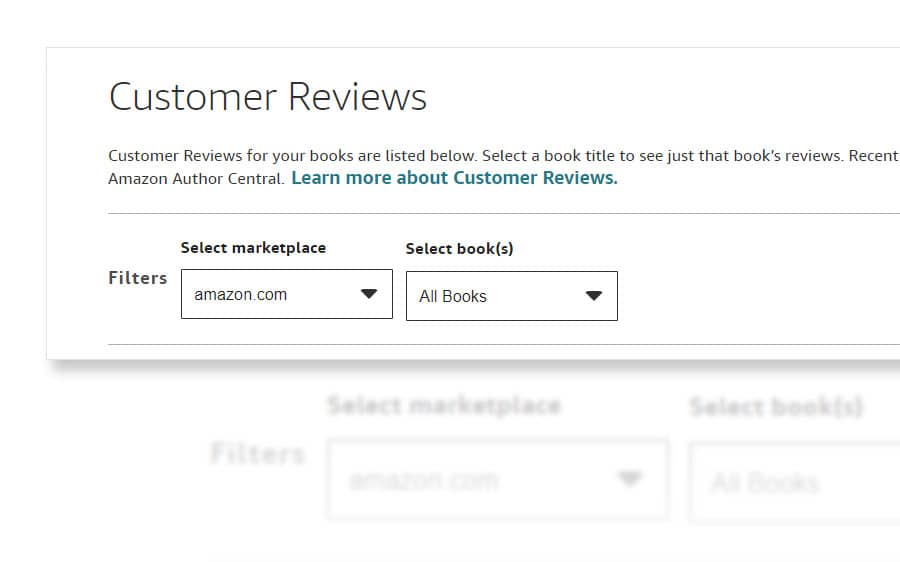
Customer Reviews
View all of the customer reviews of your book in one place.
Easily search and filter for specific books and marketplaces by making selections in the dropdown boxes.
Stuck Somewhere Along the Road?
If you are having trouble with any part of the Author Central set-up, they have a great customer support system. To get in touch with someone at Author Central, scroll down to the bottom of the page and locate the hyperlinked “Contact Us” text.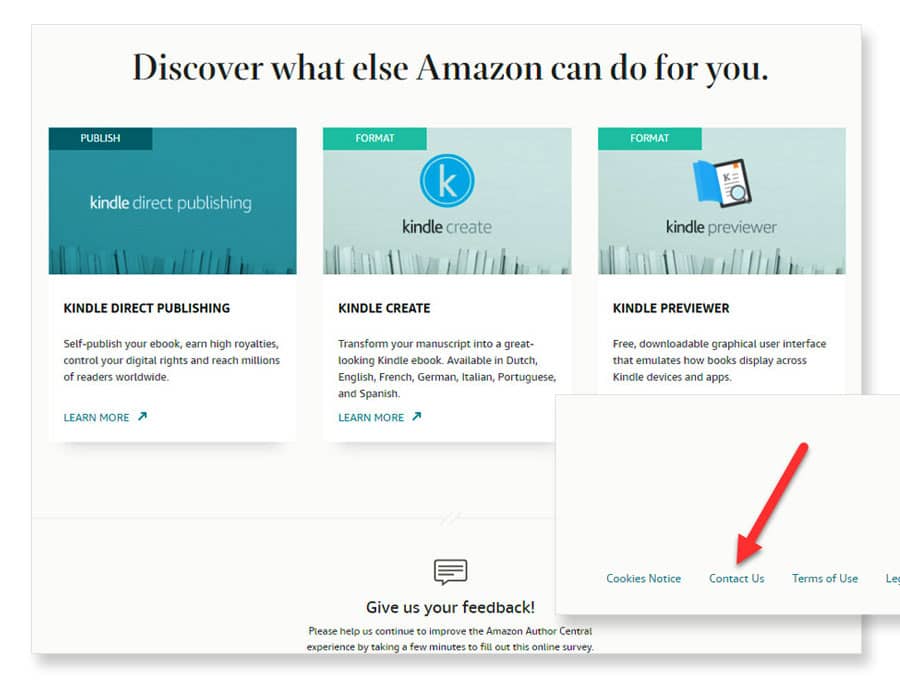
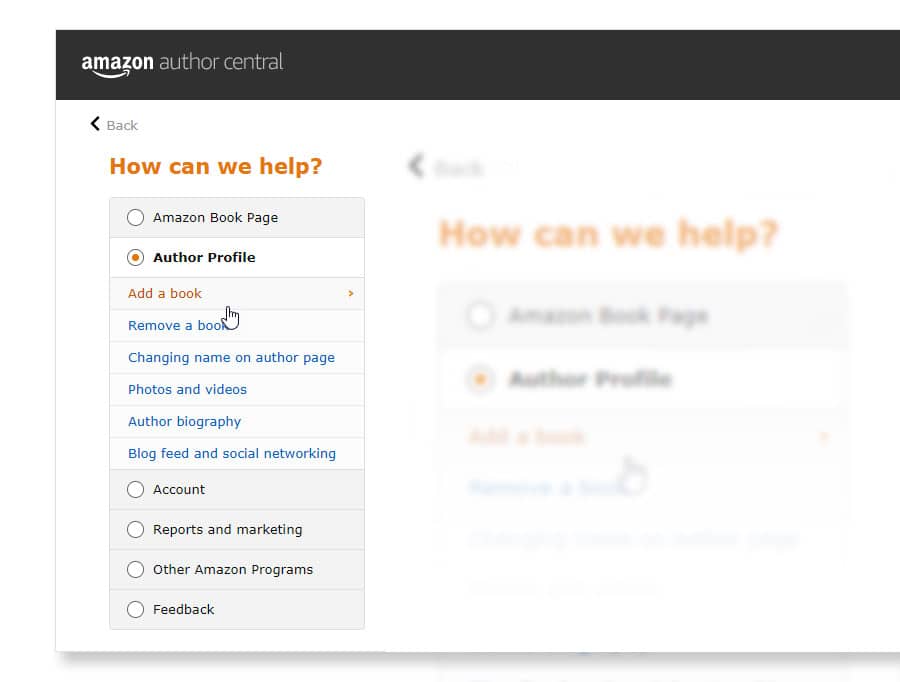
Click on the text and choose from a menu of help topics.
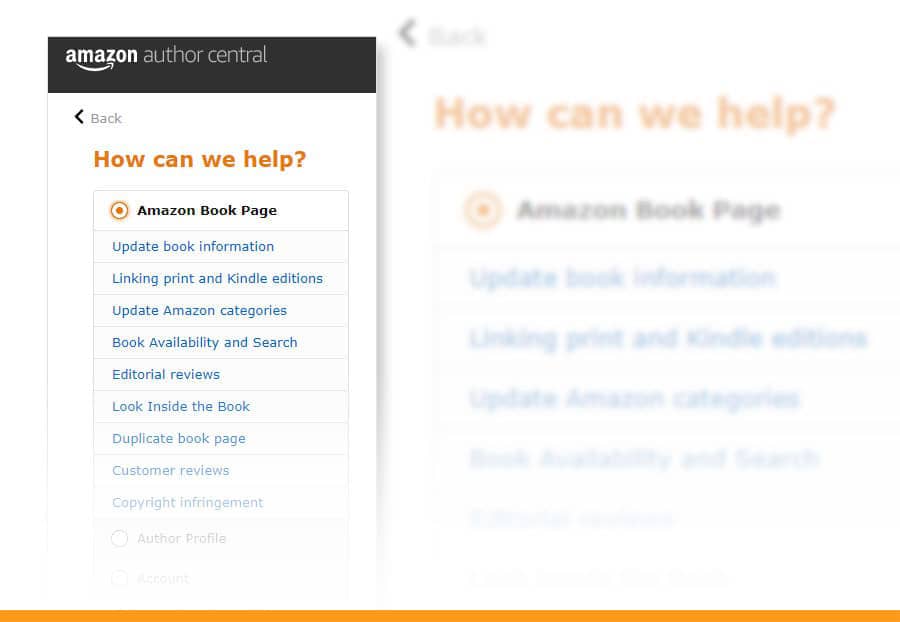 Click on any topic for the option to email support or have them call you when a representative is available.
Ready, Set… Go!
Smart authors know that they should take advantage of every resource – especially free resources – and Author Central is one of best resources out there.
Don’t let another day go by without making the most of your Amazon sales pages, hop on over to author.amazon.com and get to work. We can’t wait to see your pages when they’re done!
If you liked this article you might also like:
• Self-Publishing Success Stories. Secrets of Million Dollar Self-Publishers!
• My Book Is Not Selling! – What’s the Problem?
• The Book Marketplace Has Changed. Make Your Book Available From All the Online Retailers!
• A Book Marketing Plan. – Why You Should Have It and How Can It Help You Sell More Books?
• Never Judge a Book By Its Cover! – Are You Really Sure?


